Whether you’re branding products, packaging orders, or promoting an event, sticker printing is one of the most versatile and affordable ways to get seen. But there’s a big difference between a forgettable label and one that people actually want to stick on laptops, water bottles, and notebooks. The secret lies in smart design choices paired with the right printing options.
This guide breaks down practical, real-world tips to help your stickers and labels truly pop—visually, physically, and even emotionally.
Start with a clear goal for your sticker
Before opening your design software, answer one question: What do I want this sticker to do? Your answer will guide layout, copy, material, and finish.
Common sticker goals:
- Brand visibility – Logo stickers, shipping box labels, swag
- Product information – Ingredient labels, bottle labels, jar wraps
- Promotional use – Event stickers, QR code promotions, limited editions
- Functional purposes – Instruction labels, warning stickers, barcodes
Define:
- Where will it be used? (Indoors vs outdoors, packaging vs merchandise)
- How long should it last? (Temporary promo vs long-term branding)
- Who is it for? (Kids, corporate clients, eco-conscious customers)
When your goal is clear, every design decision becomes easier, and your sticker printing budget stretches further.
Choose the right shape and size first
Most people start with colors and fonts. In reality, shape and size quietly control how impactful—and practical—your sticker will be.
Consider shape
-
Standard shapes (circle, square, rectangle, oval)
- Cheaper, faster to print
- Great for logos, QR codes, basic product labels
-
Custom die-cut shapes
- Follow the outline of your logo or artwork
- Instantly more eye-catching
- Ideal for brand swag and laptop stickers
-
Kiss-cut sheets
- Multiple smaller stickers on one sheet
- Perfect for sticker packs, sets, or planners
Consider size
Ask:
- Will it fit where it needs to go? (bottles, boxes, envelopes, laptops)
- Is text still legible at arm’s length?
- Will the user easily peel and apply it?
Tip: Print a test size on regular paper, cut it out, and place it where the sticker will go. Adjust up or down before committing to a large print run.
Designing for impact: layout and visual hierarchy
A strong layout ensures your message is instantly understood, even at a glance.
Prioritize one main focal point
Decide what should be noticed first:
- Your logo
- Product name
- A bold tagline
- A QR code or offer
Make that element larger, bolder, or more contrasting than everything else.
Use visual hierarchy
Guide the eye using:
- Size – Larger elements first, smaller details later
- Weight – Bold fonts vs regular fonts
- Color – High contrast for important details
- Spacing – More breathing room around key information
For product labels, a typical order might be:
- Brand name / logo
- Product name or main benefit
- Supporting details (scent, flavor, variant)
- Required or legal info (ingredients, warnings, barcodes)
Smart color choices that print beautifully
What looks good on screen doesn’t always look good on paper or vinyl. Color decisions can make or break your sticker printing results.
Design in CMYK, not RGB
Most printers use CMYK (cyan, magenta, yellow, black). Designing in RGB can lead to unexpected color shifts when printed. Use CMYK color mode in your design software to get closer to final output.
Use strong contrast
Legibility is everything. Aim for:
- Dark text on a light background, or vice versa
- Avoid light-on-light (e.g., pale yellow text on white)
- Test readability at 100% and smaller scales
Limit your palette
- Stick to 2–4 main colors for a cleaner, more memorable design
- Use tints and shades of those colors for depth
- Align colors with your brand’s identity and target audience
Consider your material color
- White vinyl or paper: your colors appear most accurate
- Clear stickers: colors can look more transparent; add a white ink layer behind artwork if needed
- Kraft or colored stock: your base color will influence how ink colors appear
Typography that stays readable at sticker scale
Stickers are small by nature. Fancy fonts that look beautiful in a poster can turn into mush at 2 inches wide.
Choose the right fonts
- Use simple, clean typefaces for core information
- Reserve decorative fonts for short headings or single words
- Avoid ultra-thin or extra-light fonts; they often disappear in print
Minimum sizes
As a general rule:
- Body text: 6–8 pt minimum (depending on the font)
- Important details: 8–10 pt
- Main headlines: 12–18 pt or larger
Print a sample on your home or office printer. If you squint to read it, it’s too small.
Avoid text crowding
Give text room:
- Add margins around block text
- Avoid placing text too close to the sticker edge
- Keep at least 2–3 mm of safe space inside the trim line
File setup essentials for crisp sticker printing
Clean design is one thing; proper file setup is what ensures sharp, professional results.
Use high-resolution artwork
- Set artwork to 300 dpi at actual sticker size
- Avoid stretching small images larger—they’ll look blurry
- Use vector formats (AI, EPS, SVG, PDF) when possible for logos and line art
Add bleed and safe margins
Most print shops require:
- Bleed: 1/8 inch (3 mm) beyond the cut line so art extends fully to the edge
- Safe area: Keep important text/logos at least 1/8 inch (3 mm) inside the cut line
This prevents awkward white edges or chopped-off content if there’s slight cutting variation.
Use the right file format
- PDF (preferred by many printers)
- AI / EPS (vector)
- High-resolution PNG or TIFF (for raster designs)
Check your printer’s exact specs before you export.
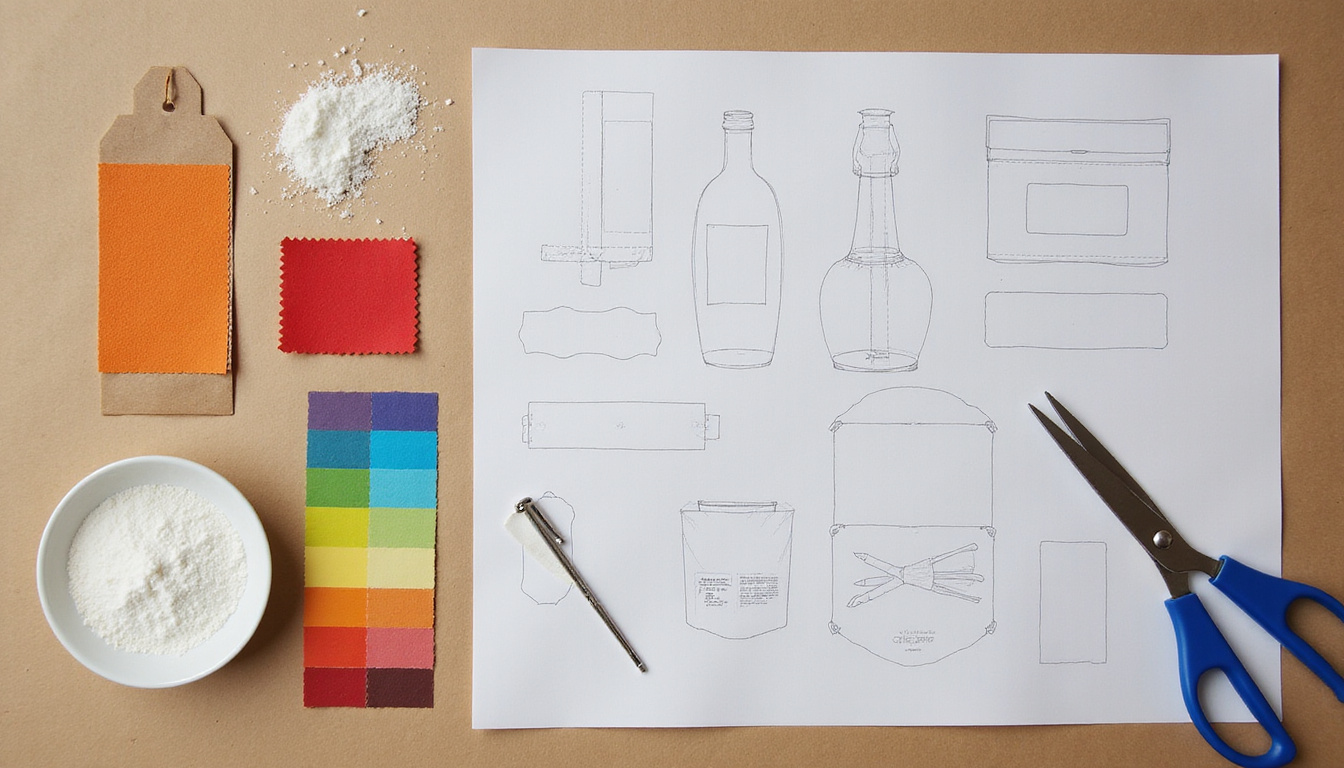
Pick the best material for your use case
The material you choose affects durability, color vibrancy, and overall feel.
Common options
-
Paper stickers
- Affordable, great for short-term use and indoor packaging
- Not waterproof; can scuff or tear more easily
-
Vinyl stickers
- Durable, waterproof, and UV-resistant (depending on coating)
- Ideal for outdoor use, water bottles, laptops, cars
-
Clear stickers
- See-through background for a “printed-on” look
- Great for windows, glass jars, and minimalist branding
-
Kraft / recycled stock
- Earthy, eco-friendly look
- Perfect for organic, handmade, or sustainable brands
Match finish to function
- Gloss – Shiny, bold colors, eye-catching; shows fingerprints more easily
- Matte – Softer, premium feel; easier to read in bright light
- Soft-touch / satin – Tactile, luxury effect for high-end products
For product labels that might get wet (like cosmetics or beverages), choose waterproof vinyl plus a protective laminate.
Don’t forget the adhesive strength
Adhesive isn’t glamorous, but it’s crucial.
-
Removable adhesive
- Good for temporary promotions, limited-time offers, or rented equipment
- Peels off cleanly without residue in most cases
-
Permanent adhesive
- Longer-lasting bond for products, packaging, outdoor use
- Harder to remove cleanly
-
Specialty adhesives
- Freezer-safe for frozen goods
- High-tack for rough surfaces (wood, cardboard, certain plastics)
Think about the surface: smooth glass is easier than textured cardboard. Show your printer a sample surface if you’re unsure.
Design tricks to make labels and stickers pop
Once the fundamentals are in place, a few design enhancements can dramatically boost impact.
Use borders sparingly
Borders can look great, but they highlight any cutting misalignment. If you use one, keep it thick enough and allow generous margin so slight shifts aren’t obvious.
Add visual depth
- Use subtle shadows, gradients, or outlines around main elements
- Add a thin outline around text on busy backgrounds for better legibility
- Use contrasting shapes (e.g., circular logo on a square background)
Consider special finishes
If your printer offers them, these can transform a basic sticker:
- Foil accents – Metallic elements for logos or key words
- Spot UV – Glossy highlights on a matte background
- Holographic material – Iridescent base for bold, modern designs
Special finishes cost more, but using them selectively on premium products or limited drops can be worth it.
Test before you print in bulk
Even experienced designers prototype.
-
Print a small run or ask for a sample pack from your print provider.
-
Test:
- Color accuracy vs your design
- Text readability in real-life lighting
- Adhesion on actual surfaces
- Durability: scratch, rub, and (if relevant) get them wet
-
Note any issues and adjust your design, material, or finish accordingly.
Investing in a short test run can save you from costly mistakes on a larger order.
Work with your printer, not against them
Commercial sticker printing services handle these jobs every day and often publish detailed file recommendations on their sites. For example, major print providers and trade groups offer best practices on color, bleed, and resolution to reduce reprints and errors (source: Printing Industries of America).
Make use of their expertise:
- Download their templates (AI, PSD, PDF) to ensure correct bleed and cut lines.
- Ask questions about the best materials for your use case.
- Share photos or samples of where and how your stickers will be used.
The more context they have, the better they can guide you.
Quick checklist before sending to print
Use this list to catch common issues:
- [ ] Goal is clear (branding, product info, promo, etc.)
- [ ] Shape and size tested in real life
- [ ] Design set in CMYK at 300 dpi
- [ ] Strong contrast between text and background
- [ ] Fonts are legible at final size
- [ ] Bleed and safe margins correctly set
- [ ] Important elements away from edges and cut lines
- [ ] Material and finish chosen for actual use (indoor/outdoor, wet/dry)
- [ ] Adhesive type matched to surface and duration
- [ ] Small test run or proof ordered
FAQ: sticker printing questions
1. What file format is best for professional sticker printing?
PDF with embedded fonts (or outlined text) is usually best for professional sticker printing, especially when it includes vector artwork. AI and EPS files are also widely accepted. If you’re sending a raster image, use high-resolution PNG or TIFF at 300 dpi.
2. Which material should I choose for waterproof labels and stickers?
For waterproof label and sticker printing, choose vinyl or another synthetic material paired with a laminate finish. This combination resists water, oils, and UV light better than standard paper, making it ideal for cosmetics, beverages, and outdoor gear.
3. How do I make sure my colors look right when printing stickers?
Design in CMYK, not RGB, and use your printer’s color profile if available. Keep saturation and contrast strong and avoid ultra-neon hues that can’t be reproduced in standard sticker printing. When color accuracy is critical, request a printed proof before committing to a large run.
Turn your ideas into stickers people actually keep
Well-designed stickers and labels don’t just decorate—they extend your brand, carry your message, and turn everyday surfaces into tiny billboards. When you combine intentional design with the right materials, finishes, and file prep, your sticker printing projects stop feeling like a gamble and start becoming a reliable, high-impact marketing tool.
If you’re ready to turn your concepts into real-world stickers that people want to use—and keep—start by applying the tips above to your next design. Then reach out to a trusted print provider, share your goals, and request samples or a proof run. The sooner you prototype and refine, the sooner you’ll have labels and stickers that truly pop in customers’ hands and in the world.