Foil Stamping Secrets: Transform Ordinary Packaging Into Luxury Finishes
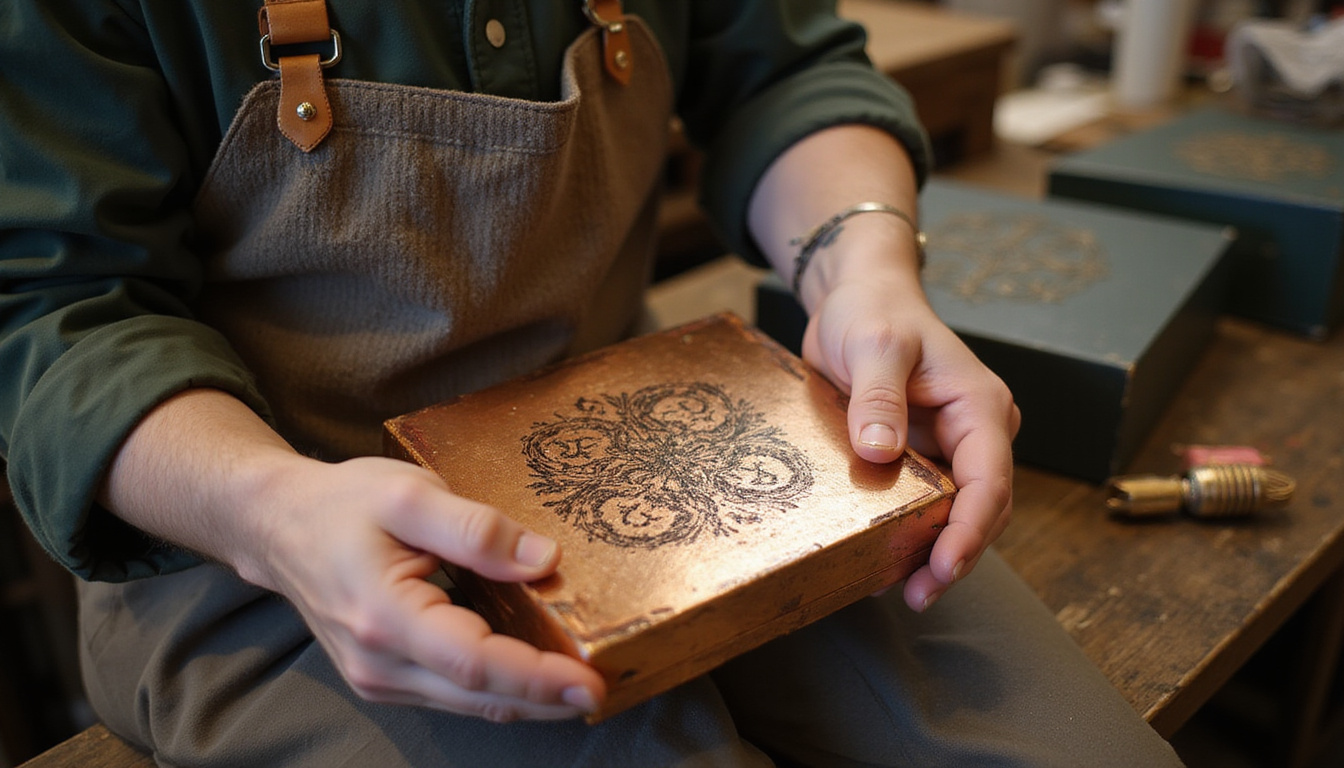
Foil stamping is one of the fastest ways to transform ordinary packaging into a premium, high-value experience. From cosmetics boxes and perfume cartons to chocolate sleeves and tech accessories, that shimmering metallic detail instantly signals quality, care, and luxury. Yet many brands only scratch the surface of what’s possible with foil — or they use it in ways that add cost without adding impact.
This guide walks you through the real-world secrets of foil stamping so you can elevate your packaging strategically, not just decoratively.
What Is Foil Stamping, Really?
Foil stamping (often called hot foil stamping) is a printing and finishing process that uses heat, pressure, and a thin layer of metallic or pigmented foil to create shiny, opaque designs on paper, cardboard, and some plastics.
At a high level, the process involves:
- A metal die engraved with your artwork (logo, text, pattern).
- A roll of foil (metallic, holographic, pigment, etc.).
- Heat and pressure to transfer the foil from the film onto the packaging surface.
The result is a crisp, reflective area that catches light and feels slightly tactile. Unlike metallic inks, foil produces a true metal-like shine and excellent opacity, even on dark backgrounds.
The Main Types of Foil Stamping Finishes
Not all foil is gold. Understanding the options helps you choose finishes that support your brand, not fight it.
1. Metallic Foils
The classic look: mirror-like, highly reflective, and rich in color.
Common options:
- Gold (from pale “champagne” to rich “antique” gold)
- Silver (bright, satin, or tinted silver)
- Rose gold and copper
- Colored metallics (blues, reds, greens, etc.)
Use metallic foil stamping for logos, borders, seal emblems, and key text you want to immediately draw the eye.
2. Matte and Satin Foils
Matte foils offer a soft, non-reflective finish, while satin foils sit in between matte and metallic. They feel more understated and sophisticated.
These are ideal when:
- Your brand is minimalist and modern.
- You want contrast without high shine.
- You want readable text over very glossy or dark backgrounds.
3. Holographic and Specialty Foils
Holographic foils use diffraction patterns that create a rainbow or depth effect. Other specialty foils include pearlescent, clear “spot gloss” style foils, and patterned foils (e.g., brushed metal effect).
Best used for:
- Limited editions and seasonal packaging
- Youthful or tech-focused brands
- Security features or anti-counterfeiting cues
4. Pigment Foils
Pigment foils are opaque colors without metallic shine. Think of them as super-solid blocks of color, often used where regular ink might struggle to pop (such as on dark stocks).
They can be great for:
- White or colored logos on black packaging
- Bold, flat graphic elements
- Consistent color output on textured or uncoated papers
How Foil Stamping Works: From Design to Finished Box
Knowing the mechanics of foil stamping helps you design smarter and avoid costly revisions.
Step 1: Artwork and Die Creation
Your printer uses your vector artwork to create a metal die (usually brass or magnesium). This die has a raised surface that matches the parts you want foiled.
Design tips at this stage:
- Use vector files (AI, EPS, PDF) — avoid rasterized logos.
- Keep line weights at least 0.3–0.4 mm for crisp transfer.
- Avoid ultra-fine details in tiny text; foil can bridge over.
Step 2: Registering the Foil
The press operator mounts the die and aligns the foil roll over your packaging substrate. Registration is critical — especially when foil is combined with printing or embossing.
Good practice:
- Allow for small tolerances between printed elements and foil edges.
- Avoid designs where the foil must perfectly “kiss” complex printed art unless your printer is highly experienced.
Step 3: Heat and Pressure Application
The press applies heat and pressure, pressing the die into the foil and substrate. The heat activates adhesive on the back of the foil, which bonds to the surface wherever the die contacts.
Variables that affect quality:
- Temperature: Too low and the foil won’t stick; too high and details blur.
- Dwell time: How long pressure is applied.
- Pressure: Enough to transfer foil cleanly without crushing the substrate.
Step 4: Inspection and Finishing
After stamping, sheets or boxes are checked for:
- Incomplete coverage or pinholes
- Mis-registration with print
- Over-pressed areas or burnishing
The pieces are then cut, glued, or folded into final packaging.
Design Secrets: How to Use Foil Stamping for Maximum Impact
Adding foil is easy. Adding it well is not. The most effective packaging follows a few core principles.
1. Use Foil as a Focal Point, Not Wallpaper
Foil works best when it draws attention to the most important elements.
Prioritize:
- Brand mark or monogram
- Product name or key descriptor
- Signature graphic or pattern
Avoid flooding large areas with foil “just because.” This can look cheap, scratch more easily, and drive up cost without enhancing perceived value.
2. Pair Foil With Negative Space
Luxury packaging often breathes. Let foil elements sit in ample negative space to heighten their visual importance.
Try:
- Centered, foiled logos on minimalist fronts
- Small foil accents against a quiet, textured paper
- Simplified layouts where foil does the talking
3. Consider Readability and Contrast
Foil stamping is reflective; under certain lighting, gloss and metallics can reduce legibility.
To keep text readable:
- Use bolder weights and larger sizes for critical information.
- Ensure good contrast between foil color and paper color.
- Avoid long passages of small foiled text — reserve foil for headings or short phrases.
4. Combine Foil With Embossing or Debossing
Foil alone looks premium; foil plus texture feels premium.
Popular combinations:
- Foil + emboss: The foiled area is raised, adding a sculpted, jewelry-like effect.
- Foil + deboss: The foiled area is pressed in, creating a carved, engraved feel.
- Blind embossing: Embossed design with no foil, next to a foiled element for contrast.
These techniques create a multisensory experience: what you see matches what you feel.
Choosing the Right Materials for Foil Stamping
The substrate you choose has a huge impact on how your foil looks and wears over time.
Coated vs. Uncoated Papers
- Coated papers/boards (e.g., glossy or silk) give very sharp, mirror-like foil. Ideal for high-gloss, ultra-reflective luxury looks.
- Uncoated papers (e.g., cotton, kraft, textured) yield slightly softer edges and a more tactile, “artisanal” effect. Great for boutique or eco-luxury brands.
Both work well with foil stamping — your brand positioning should guide the choice.
Dark vs. Light Backgrounds
Foil on dark backgrounds is dramatic; foil on light backgrounds is subtle and clean.
- Dark + metallic: Strong contrast and standout shelf presence.
- Light + metallic or matte: Refined, understated, “quiet luxury.”
Experiment with mockups or samples before committing to a large run.
Consider Durability
If your packaging will be handled frequently (e.g., cosmetics in retail, subscription boxes), durability matters.
Ask your printer about:
- Foil types with higher abrasion resistance
- Protective coatings or laminations that won’t dull the foil
- Testing samples for scratch resistance and adhesion
Cost Factors: How to Maximize Value From Foil Stamping
Foil stamping isn’t the cheapest finish, but it can deliver huge perceived value when used strategically.
Major cost drivers include:
-
Die creation
- One-time cost per design, per size.
- More complex, larger areas = higher die cost.
-
Run length
- Unit cost drops as volume increases.
- Foil stamping is more economical for medium to large runs, though short-run digital foiling options are improving.
-
Foil coverage and passes
- Multiple foil colors usually mean multiple passes = more setup and time.
- Large solid areas consume more foil and can be harder to run cleanly.
To control costs:
- Concentrate foil on key elements instead of full coverage.
- Limit the number of foil colors per design.
- Reuse dies across SKUs when possible (e.g., same branded lid, different printed base).
Sustainability and Foil Stamping: What You Need to Know
There’s a common misconception that adding foil makes packaging non-recyclable. In reality, when used in normal amounts, foil-stamped paper and board are generally recyclable through standard streams because the foil layer is extremely thin and is removed during the paper re-pulping process (source: FSEA / Foil & Specialty Effects Association).
To keep your foil-stamped packaging as eco-conscious as possible:
- Use responsibly sourced, certified papers (FSC, PEFC).
- Keep foil coverage moderate instead of fully foiling large surfaces.
- Avoid plastic laminates when a high-quality varnish will suffice.
- Work with printers who follow best practices for waste reduction.
Eco-luxury is no longer a contradiction; many premium brands combine tactile, uncoated stocks with subtle foil accents to signal both quality and responsibility.
Real-World Use Cases: Where Foil Stamping Shines
Beauty and Skincare
- Foiled brand marks on cartons to differentiate on crowded shelves.
- Holographic accents for “active” or high-tech claims.
- Rose gold foil for premium, feminine positioning.
Food and Beverage
- Gold foil crests or seals on chocolate and confectionery boxes.
- Silver or copper foils on craft beverage labels.
- Foil accents on limited-edition or seasonal packaging.
Tech and Luxury Accessories
- Minimalist black boxes with subtle foiled logos.
- Debossed, foiled patterns on inner trays or sleeves.
- Foil used as part of anti-counterfeit tactics.
Stationery and Gifting
- Foil-stamped gift boxes and sleeves.
- Custom foiled tissue seals and belly bands.
- Wedding, holiday, or premium corporate gifting sets.
In all of these, foil stamping is not the star by itself; it’s the supporting actor that makes the entire presentation feel elevated.
Implementation Checklist: Planning Your Next Foil Project
Before you brief a designer or printer, run through this quick checklist:
- [ ] What is the primary goal of foil? (Logo emphasis, luxury signal, limited edition)
- [ ] Which specific elements will be foiled? (Logo, product name, pattern)
- [ ] What foil type and color best matches the brand? (Metallic, matte, holographic)
- [ ] Which substrate will you use? (Coated/uncoated, color, texture, thickness)
- [ ] Is your artwork foil-friendly? (Vector, adequate line weights, font sizes)
- [ ] How many foil colors and passes can your budget support?
- [ ] How will foil interact with other finishes? (Embossing, varnish, lamination)
- [ ] Have you requested physical samples or a proof before full production?
Addressing these points early avoids disappointment and ensures that your investment in foil stamping translates into real brand value.
FAQ: Common Questions About Foil Stamping in Packaging
Q1: Is foil stamping expensive compared to other print finishes?
Foil stamping usually costs more than standard ink and simple varnish, but it can be comparable to other specialty finishes like embossing or spot UV. When used selectively on high-impact areas, the perceived value often outweighs the incremental cost, especially in premium segments.
Q2: Can I combine foil printing with other special effects?
Yes. Foil stamping can be combined with embossing, debossing, spot UV, textured varnishes, and even laser cutting. The key is working closely with your printer to sequence the processes correctly and ensure the substrate can handle multiple passes without warping.
Q3: What materials work best for metallic foil printing on packaging?
Most quality paperboards and cards work well. Coated boards yield a sharper, glossier metallic foil, while uncoated or textured boards provide a softer, more tactile look. Avoid very rough or fibrous surfaces for fine details, and always test on your chosen substrate before committing to a large run.
Foil stamping, used with intention, can turn a simple box into an unforgettable brand touchpoint. It signals quality before your customer even opens the package, reinforces your positioning, and sets you apart in crowded categories.
If you’re ready to explore how foil stamping could elevate your packaging — from material selection and design concepts to production-ready files — now is the perfect time to start. Collaborate with an experienced packaging partner, request samples, and build a foil-forward concept that aligns with your brand and budget. Your next product launch doesn’t have to look ordinary; with the right foil strategy, it can look undeniably premium.