Embossing is one of those deceptively simple techniques that can instantly turn flat, ordinary paper into tactile, dimensional artworks. Whether you’re making handmade cards, luxury packaging, wall art, or wedding invitations, embossing adds depth, shadows, and a professional finish that’s hard to achieve any other way.
This guide walks you through key embossing methods, tools, design tips, and practical applications so you can confidently start transforming paper into striking, touchable art.
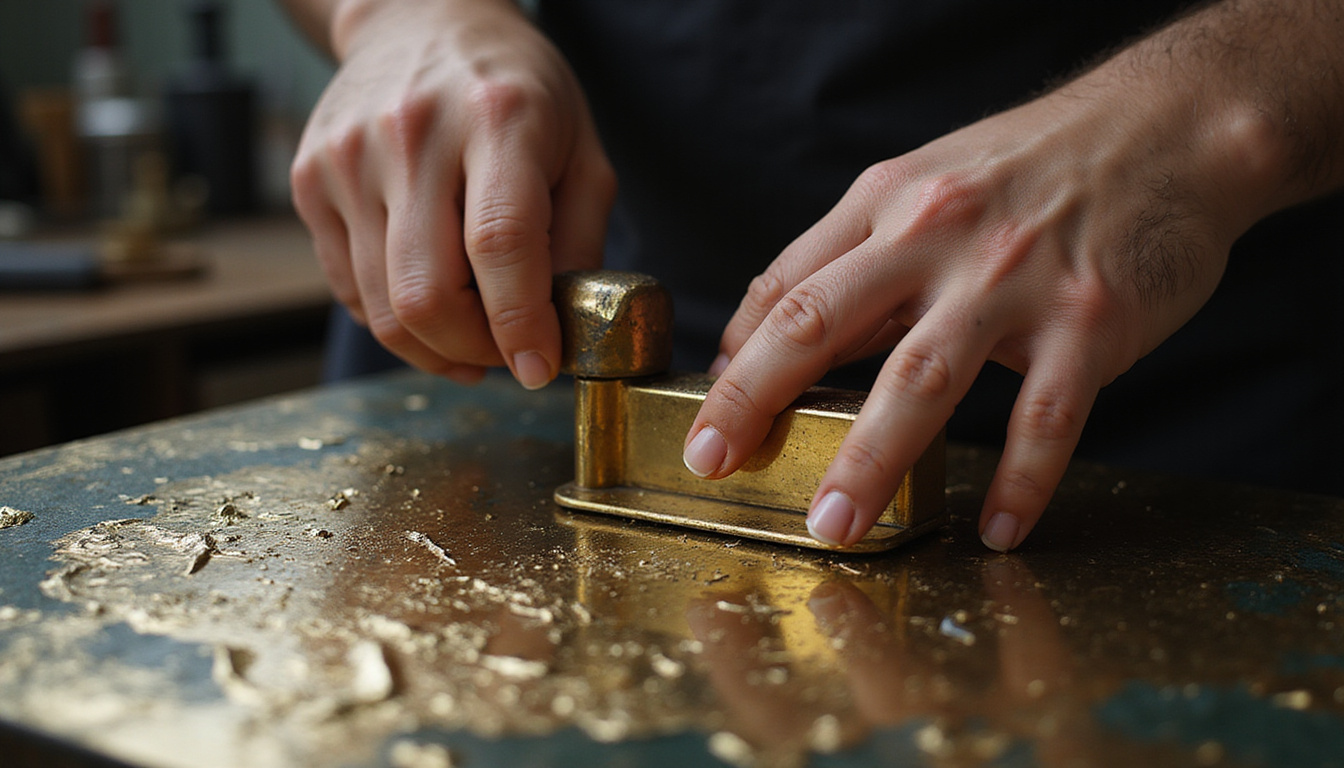
What Is Embossing?
In paper crafting and printmaking, embossing is the process of creating a raised (or sometimes recessed) design on the surface of paper, cardstock, or similar materials. Pressure, heat, and sometimes special powders or foils are used to sculpt the paper’s fibers into a new contour.
At its core, embossing does three things:
- Adds depth and texture
- Enhances visual interest with light and shadow
- Communicates quality and craftsmanship
You’ll find embossing everywhere: on business cards, high-end packaging, stationery, book covers, and even currency (source: U.S. Bureau of Engraving and Printing).
The Main Types of Paper Embossing
Before diving into techniques, it helps to understand the main categories of embossing you’ll encounter.
1. Blind Embossing
Blind embossing creates a raised design with no added color, ink, or foil. The result is subtle and sophisticated—perfect for minimalist stationery, logos, or monograms.
Characteristics:
- Purely tactile and visual through shadows
- Works best with thicker, soft papers
- Ideal for understated branding and fine art prints
2. Debossing
Debossing is the inverse of embossing: the design is pressed down into the paper instead of raised. It still plays with light and shadow but gives a sunken, engraved feel.
Uses:
- Logos and titles on book covers
- Modern, industrial-style stationery
- Paired with ink or foil for dramatic contrast
3. Heat Embossing (with Powder)
Heat embossing uses embossing ink and powder that melt under heat to create a raised, glossy (or matte) design on the paper’s surface.
You’ll often see it in:
- Cardmaking and scrapbooking
- Lettering and calligraphy accents
- Mixed-media artworks
4. Dry Embossing (Relief Embossing)
Dry embossing uses pressure alone—no heat, no powder. It’s typically done with stencils, embossing folders, or metal plates and a machine or hand tool.
Benefits:
- Clean, crisp details
- No drying time
- Great for backgrounds and texture
5. Foil Embossing / Foil Debossing
Foil embossing combines metallic or pigmented foil with embossing or debossing. Heat and pressure transfer the foil to the paper for a luxurious look.
Common uses:
- Premium invitations
- Certificates and diplomas
- Packaging for cosmetics, perfumes, and chocolate
Essential Tools and Materials for Embossing
You don’t need an entire studio to begin embossing, but having the right tools will dramatically improve your results.
Core Tools
- Embossing machine (die-cut/embossing press): Machines like the Sizzix Big Shot or similar create even pressure for dry embossing with folders or metal plates.
- Heat tool: A specialized heat gun for melting embossing powder without blowing it away. A hair dryer is usually too powerful and diffuse.
- Stylus or embossing pen: For hand (dry) embossing with stencils; comes with rounded metal tips in different sizes.
- Embossing folders and stencils: Pre-designed patterns that imprint texture into your paper.
- Metal dies and plates: For more intricate or custom designs used with a press.
Consumables
- Paper and cardstock: Thicker, high-quality paper (generally 200 gsm and above) gives cleaner, deeper impressions.
- Embossing ink pads and pens: Slow-drying, sticky ink (often clear) that holds embossing powder in place.
- Embossing powders: Available in glossy, matte, metallic, glitter, opaque, and transparent finishes.
- Foils: Colored or metallic foil sheets for foil embossing or hot foil stamping.
- Anti-static powder tool: Reduces stray embossing powder and keeps lines crisp.
How to Do Heat Embossing: Step-by-Step
Heat embossing is accessible and extremely versatile. Here’s a straightforward process to try at home.
-
Prepare your surface
- Choose a sturdy, heat-resistant backing to work on.
- Rub an anti-static powder tool over your paper to prevent stray powder.
-
Stamp or draw your design
- Use a rubber stamp with embossing ink, or draw with an embossing pen.
- Work quickly so the ink stays sticky.
-
Apply embossing powder
- Sprinkle powder generously over the inked areas.
- Tap off the excess onto scrap paper and funnel it back into the jar.
-
Melt with a heat tool
- Hold the heat tool a few inches away and move it slowly over the design.
- Watch for the powder to change from grainy to smooth and raised; stop heating immediately once melted to avoid scorching.
-
Cool and inspect
- Let the piece cool for a few seconds.
- Check for any missed spots and repeat if needed.
This method is perfect for crisp lettering, intricate stamps, and bold design elements that pop against flat backgrounds.
How to Do Dry Embossing: Step-by-Step
Dry embossing is ideal for adding subtle texture and patterns to larger areas.
Using Embossing Folders and a Machine
-
Select your folder and paper
- Choose a design and a paper that isn’t too thin (to avoid tearing).
-
Make the sandwich
- Place your paper inside the folder, aligning it as desired.
- Layer it between the cutting plates according to your machine’s instructions.
-
Run through the machine
- Roll the “sandwich” through the embossing machine slowly and steadily.
- The pressure pushes the design into the paper.
-
Reveal the texture
- Open the folder to reveal the raised pattern.
- Optionally, lightly ink or paint over the raised areas to highlight them.
Hand Dry Embossing with Stencils
-
Secure stencil and paper
- Place your stencil on a lightbox or hold it up to a window.
- Tape the paper over it so it doesn’t shift.
-
Trace with a stylus
- Gently rub the stylus over the design, pushing the paper into the stencil’s openings.
- Use light, even pressure to avoid tearing.
-
Refine details
- Switch to smaller stylus tips for finer lines and corners.
- Flip the paper over to check your raised design.
Hand embossing gives you fine control, making it a great way to add custom flourishes or work on small, detailed pieces.
Paper Choices That Make Embossing Shine
Not all paper reacts to embossing the same way. The right choice can be the difference between a shallow impression and a gallery-worthy artwork.
Consider the following factors:
- Weight (thickness): Medium to heavy cardstock (200–350 gsm) holds crisp, deep embossing without cracking as easily.
- Composition: Cotton or cotton-blend papers are more pliable and take deep embossing beautifully.
- Finish:
- Smooth paper reveals fine detail.
- Slightly textured paper adds character but can soften edges.
- Color:
- Light and mid-tone colors show shadows and highlights best.
- Dark papers work wonderfully with metallic or contrasting heat embossing.
If in doubt, test a small scrap before committing to a full project.
Creative Embossing Ideas to Elevate Your Art
Once you’re comfortable with the basics, you can start exploring more inventive ways to use embossing in your work.
Layered and Multi-Level Embossing
Combine multiple embossing passes or mix embossing types:
- Emboss a background pattern, then heat emboss a sentiment on top.
- Use a deep dry-embossed design and add selective metallic heat embossing over certain raised areas.
Color-Play and Inking
Embossing interacts beautifully with color:
- Ink the raised areas with a blending brush for soft gradients.
- Apply watercolor wash over heat-embossed lines; the embossing resists the paint, creating stunning “stained glass” effects.
- Add colored pencils or pastels over debossed areas for subtle shading.
Mixed-Media Embossed Artworks
Embossing doesn’t have to stay in the papercraft lane:
- Combine embossed paper with collage, stitching, or found objects.
- Create 3D wall art by layering embossed panels of different sizes.
- Use embossing to frame or highlight hand-drawn illustrations.
Functional Uses with Artistic Flair
Embossing can make everyday items feel special:
- Personalized stationery sets and envelopes
- Business cards with embossed logos or borders
- Gift tags, bookmarks, and product labels
- Journals with embossed covers or title plates
Common Embossing Mistakes (and How to Avoid Them)
To get professional-looking results, watch out for these frequent issues:
-
Warping paper: Too much heat or moisture can warp cardstock.
- Fix: Use heavier paper, keep heat tool moving, and allow pieces to cool flat under a book.
-
Stray embossing powder: Tiny flecks can spoil clean designs.
- Fix: Use an anti-static tool, gently tap and brush off excess before heating, and avoid touching the inked areas.
-
Cracked or torn paper: Overly deep embossing or thin stock can crack.
- Fix: Use thicker, high-quality paper and adjust machine pressure if possible.
-
Blurry lines: Ink bleeding or misalignment causes softness.
- Fix: Use crisp stamps, less ink, and steady stamping pressure; test alignment before embossing the final piece.
Getting Started: A Simple Embossing Project Plan
If you’re new to embossing, here’s a straightforward mini-project to build confidence:
Make a set of embossed greeting cards
- Choose smooth white or kraft cardstock, cut and folded into A2 or A6 cards.
- Dry emboss a subtle pattern as a background using an embossing folder.
- Heat emboss a bold sentiment (e.g., “Thank You” or “Happy Birthday”) in metallic powder on a small contrasting cardstock rectangle.
- Mount the sentiment panel on foam tape over the embossed background.
- Optional: Add a few inked highlights on the raised areas or small embellishments like sequins.
You’ll have a professional-looking card set that showcases both dry and heat embossing techniques.
FAQ About Embossing and Paper Art
Q1: What is embossing in art and design, and how does it differ from regular printing?
Embossing in art and design is a process that raises or indents parts of the paper to create a tactile relief image. Regular printing adds color or ink on a flat surface, while embossing actually changes the paper’s shape, resulting in depth and texture as well as visual interest.
Q2: Which embossing techniques work best for handmade cards and invitations?
For cards and invitations, dry embossing with folders or plates is ideal for backgrounds and frames, while heat embossing is excellent for sentiments, borders, and focal images. Combining both techniques produces professional, layered designs that feel high-end.
Q3: Can you do embossing at home without a machine?
Yes. You can hand-emboss using stencils and a stylus (dry embossing), or use a heat tool, embossing ink, and powders for heat embossing. While a machine offers more consistent results for large runs, many stunning small-scale artworks are created using only basic hand tools.
Embossing is one of the most rewarding ways to transform plain paper into something memorable—art that invites people not only to look but to touch. With a few essential tools and some practice, you can add depth, elegance, and personality to everything from casual greeting cards to gallery-ready mixed-media pieces.
If you’re ready to explore embossing in your own work, start by choosing one technique—heat or dry—and commit to a single project this week. Gather your materials, experiment on scraps, and then create a finished piece. As your confidence grows, you can layer techniques, mix media, and develop a signature embossed style that makes your paper artworks truly unforgettable.